Identification Guides · Oct 2026 (B.E. 2569)
A Four-Step Screen for Metal Amulets: Loop, Rim, Lettering and Surface
A transferred copy can look persuasive as a whole. Rather than relying on a vague sense that something is wrong, this guide turns four observations from the video into a repeatable procedure: locate contradictions left by manufacture, then cross-check them against reliable examples of the same issue, metal and die family.
15 min
A Four-Step Screen for Metal Amulets: Loop, Rim, Lettering and Surface
A transferred copy can look persuasive as a whole. Rather than relying on a vague sense that something is wrong, this guide turns four observations from the video into a repeatable procedure: locate contradictions left by manufacture, then cross-check them against reliable examples of the same issue, metal and die family.
The video demonstrates a coin-shaped metal amulet that its original source had already classified as a transfer-mold copy. It is useful because the loop, reverse rim, letter strokes and surface condition form a coherent chain of observations. That does not mean every piece with a similar-looking mark has the same status, nor can photographs issue an authenticity certificate for an object that has not been examined in hand.
A useful anomaly is not ‘this area looks ugly.’ It is two incompatible manufacturing histories recorded on the same object.
Step one: separate the suspension loop into outer ring, bore and centres
Beginners often ask only whether the loop is round. The video asks a more exact question: identify the bore that actually passes through the piece, then map any separate contour around it. A transfer can reproduce the host's visible ring, wear and local damage, but the new piece still needs to be pierced. If that fresh bore is not perfectly centred on the copied contour, two circles with different centres and boundaries may remain.
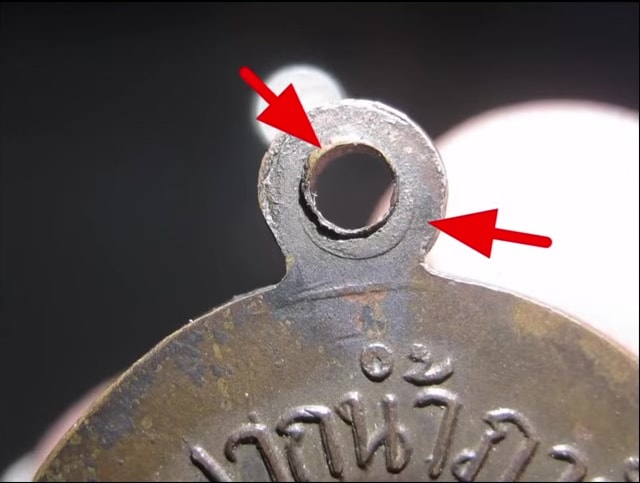
Document the loop from front, back and edge. Record the centre of the outer contour, centre of the bore, direction of offset, burrs or fresh cuts on the inner wall, and whether metal around the loop joins the body naturally. A single frontal image can turn glare, dirt or wear into a false second ring. An eccentric hole may also result from later enlargement or long use, so it must be tested against independent evidence.
Step two: trace the second contour around the reverse rim
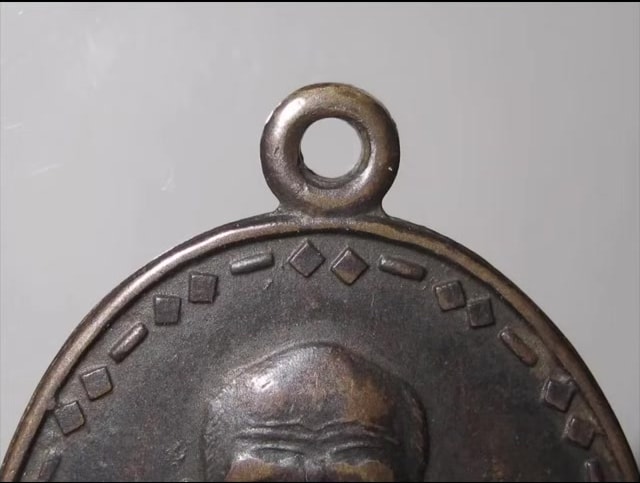
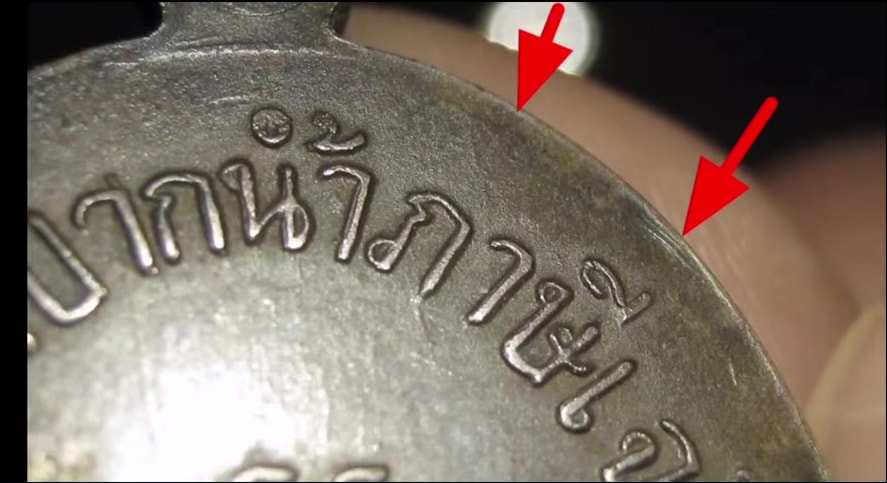
A transfer does not redraw an abstract design; it copies the three-dimensional surface of a particular host. Small displacement during molding, reduction, pressing or die correction can leave a faint contour beside what should be a single rim. In the demonstration, that offset echo can be followed through several points of the reverse border. Its agreement with the doubled history at the loop makes the observation more meaningful.
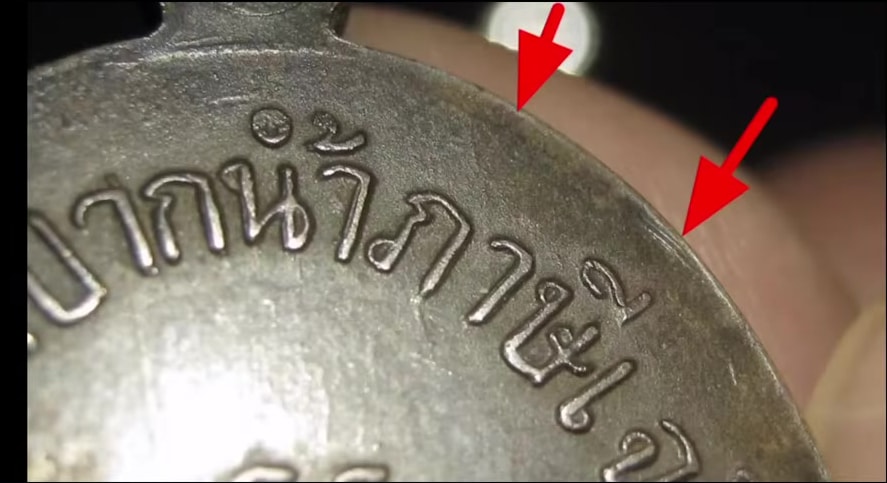
Square the piece, record close views at twelve, three, six and nine o'clock, and move a low raking light from both sides. A real relief contour changes into a paired highlight and shadow as the light moves; flat staining and compression do not maintain that geometry. A second line confined to one damaged point suggests impact first. A contour recurring at a similar offset along several arcs deserves transfer-copy investigation.
Step three: read turns, terminals and joins—not merely the words
A transfer can preserve the general wording while losing boundaries at tight turns, counters, terminals and stroke junctions. The video enlarges Thai characters to compare where a straight stroke turns, where thin and thick parts meet, and where two strokes should remain distinct. Repeated swelling, clogged corners, fused joins or missing terminals across the same inscription demand more than the blanket explanation that an old piece is simply worn.
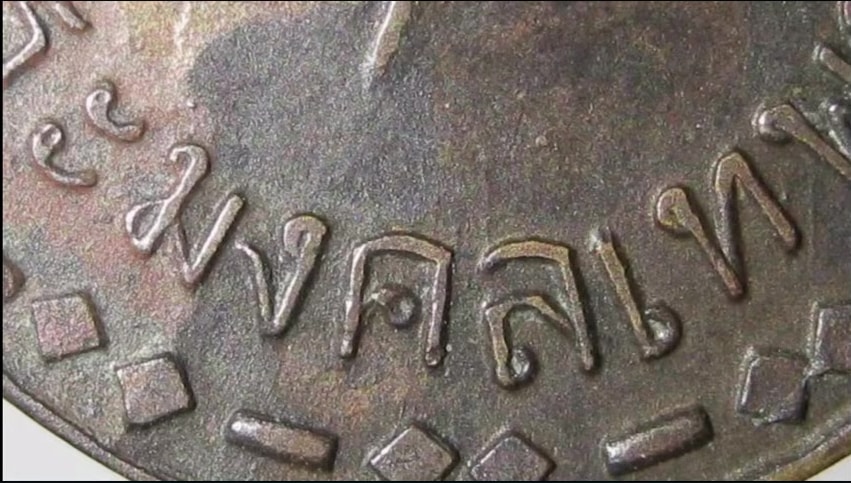
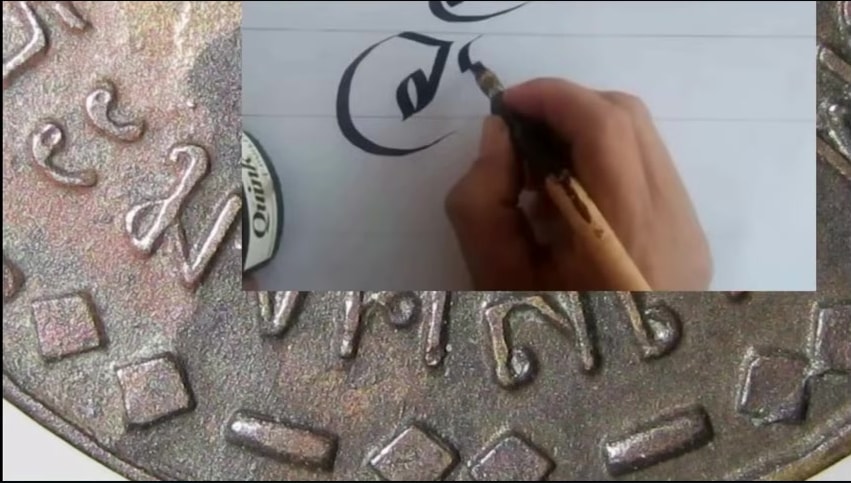
Control orientation, scale, focus and light. Rotate reference and subject to the same angle, then compare the same corner of the same character. A sharp macro and a defocused phone image are not evidence of different manufacture. Wear usually rounds exposed high points; it does not selectively turn many protected junctions into the same kind of fused mass. Conversely, damage to one letter beside an impact should first be recorded as possible later damage.
Step four: surface age gives context but cannot erase manufacturing conflicts
Pieces of the same metal and period can differ in colour because of storage, wear, perspiration, cleaning and environment. Dark is not automatically old, bright is not automatically new, and no one brown, black or green tone belongs to every genuine amulet. Examine whether colour layers make sense across exposed and protected areas, whether recesses agree with edges, and whether microtexture remains coherent as the light moves.
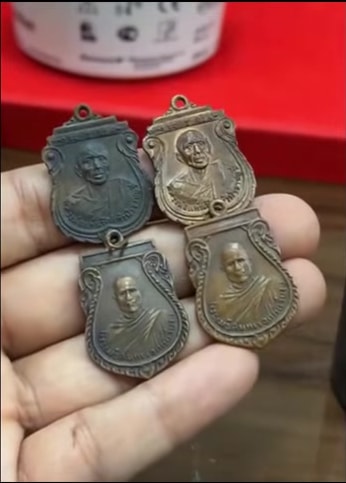
Artificial ageing can make a recent object look subdued, but it does not recentre a fresh bore, remove a doubled rim or restore missing stroke junctions. Conversely, cleaning or scratches do not automatically turn an old piece into a transfer. Step four asks whether the surface and the first three observations tell one coherent manufacturing and use history; an aged appearance does not overrule structure.
Combine the four steps as evidence, not four passwords
The value of the demonstration lies in convergence. The loop records a copied older contour plus a later bore; the reverse has an offset rim; several lettering junctions lose detail; and an aged-looking surface cannot explain those manufacturing traces. Any one symptom may have another cause. Several independent anomalies pointing in the same direction justify high-priority re-examination.
A seven-item field record
- 01Write the proposed issue, metal, die family and manufacturing method; mark uncertainty explicitly.
- 02Photograph front, back, edge and bore wall; mark the centres of contour and actual hole separately.
- 03Inspect at least four sectors of the reverse rim and record whether a second contour can be traced.
- 04Choose three to five fixed lettering turns or joins and compare them at matched angle, scale and light.
- 05Use opposing raking light to separate relief from scratches, stains and photographic highlights.
- 06Limit surface comparison to the same issue, metal and die family; record colour without treating it as a verdict.
- 07Separate supporting, conflicting and unobservable evidence; raise suspicion or confidence only when independent findings converge.
Conclusion: identify the contradiction, then choose the physical test
Mature authentication does not turn a photograph into one-hundred-percent certainty. It states how far the evidence reaches. If the loop is unclear, photograph its wall. If only one rim segment is visible, add four raking-light views. If lettering is soft, reshoot the same junction on subject and reference with one camera. Where conflicts remain, have a specialist in that issue examine dimensions, weight, edge, metal and provenance in hand. The four observations then become a workflow that can be checked, corrected and handed to the next examiner—not a hunt for an answer hidden in one picture.
Video demonstration: Metal amulet basics—loop, rim, lettering and surface
The video loads and streams from YouTube rather than this site. Every figure above is a frame from this episode, with the on-screen source credits retained.
Open on YouTube